The Soko Kit is the tool for a precise, easy and fast setup of
swash plate level (at all pitch angles)
blade tracking
collective and cyclic pitch angle
servo mid and end points
fine tuning of linkage length
centre of gravity
asolute horizontal (spirit) level of helicopter
pitch angle of the tail blades
All this comes
for all helicopter sizes
for all helicopter brands
with a resolution of 0.1 degree
with instructions in our easy to use Soko Heli Toolbox mobile application
In addition to all the above, the Soko Kit allows a perfect calibration of Self-Level or Bail-Out gyros like the Skookum SK720, MSH Brain, iKon, Bavarian Daemon, etc. It eliminates all assembling and manufacturing imperfections during the recalibration process when using the traditional vertical main shaft method.
As there are countless combinations of helicopters and gyros we are sure that due to the versatility of the Soko Kit, you might even find additional useful applications for your brand of helicopter or gyro/fbl-unit.
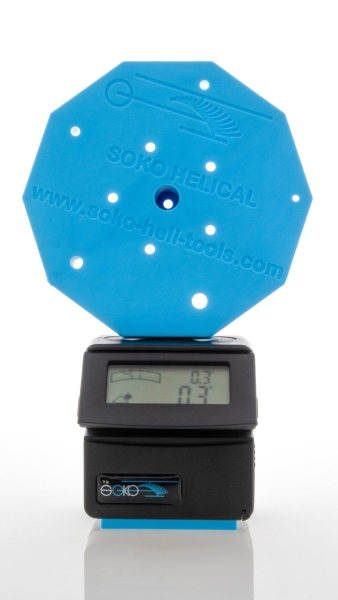
The Soko Kit: Soko Gauge and Soko Helical
The main two parts of the Soko Kit are the Soko Helical and the Soko Gauge. The latter is the next generation of the well-known bevel box with a rotating and bigger display and an additional value for absolute (spirit) level.
The Soko Helical is where all the magic happens. It is the most versatile mounting platform for the Soko Gauge.
The best, fastest und easiest way to use the Soko Kit is with our Soko Heli Toolbox mobile application.
For those of you who already own a digital angle gauge, tilt level box or bevel box you can get just the Soko Helical and mount your own gauge on it.
It is possible to get the Soko Gauge separately as well.
If you are curious how all that is achieved, go on and have a look at our How it works page.
The following is a basic description of the main steps to setup your helicopter using the Soko Kit methodology. If you are not familiar with some points don’t worry. Easiest thing to do is to download our Soko Heli Toolbox mobile app to your device. If you want to know more have a look at the old-school PDF manual.
The basic steps for a precise, easy and fast helicopter setup
The main steps are:
Use the Virtual Main Shaft feature of the Soko Heli Toolbox (or bring main shaft into vertical level)
Setup swash plate level, linkage length, servo points and zero (0°) pitch
Setup collective and cyclic pitch angles
1. Using the Virtual Main Shaft feature

The Soko Heli Toolbox mobile application is much more than an easy to use manual of the setup methodology.
With the optional Virtual Main Shaft feature it turns in a complex calculation machine. Just put your heli on any stable surface (doesn’t need to be level), take a few measurements and Soko Heli Toolbox computes a virtual model of your main-shaft-tilt in 3D space.
Old-school alternative: Bring main shaft into vertical level
Mount the Soko Kit as main blade, open the linkage of the blade grip and turn the blade grip until it rests on the side of the rotor head. On a DFC head style just open the linkage of the swash plate, flip it up and rest the upper part of the linkage on the side of the rotor head.
Put some sheets of paper under the heli so the gauge reads a constant angle (i.e. 68.2°) during a full turn of the head.
If your gauge just reads relative angles, calibrate it to spirit level or make sure that the shown angle, whatever it is, doesn’t change during a full rotation of the head. Congratulations! Your main shaft is now in absolute (spirit) vertical position.
2. Swash plate level, linkage length, servo points and zero collective pitch
Close the open linkage again.
Disconnect your motor and power up your heli electric system including your transmitter.
Set your electric system to setup the servo trims (servo mid points).
Change the linkage lengths (servo to swash plate) or the servo mid points so the gauge reads 0° absolute angle during a full turn of the head.
Once this is achieved leave your electric system as it is (set to 0° collective pitch). Mount the Soko Kit in the other blade grip. If the Soko Gauges doesn't read 0° adjust the linkage length (swash to blade grip) of the blade grip where the Soko Kit is mounted now.
Great! You successfully levelled the swash plate, setup linkage lengths, servo trims and achieved real 0° collective pitch.
3. Setup collective and cyclic pitch angles
With the Soko Helical and Soko Gauge mounted in the blade grip, setup your maximum positive and negative collective pitch as well as cyclic pitch.
The procedure is dependent of your gyro/FBL-system. The Soko Kit supports this procedure by measuring the angle of the blades.
You can also level your swash plate at full positive and full negative collective pitch if your gyro/FBL-system supports it.
Are you wondering if the Soko Helical/Soko Kit does fit on your heli? It does! No exceptions!
Read on for more details.
Detailed requirements
The setup procedure relies on two mounting positions of the Soko Helical/Soko Kit.
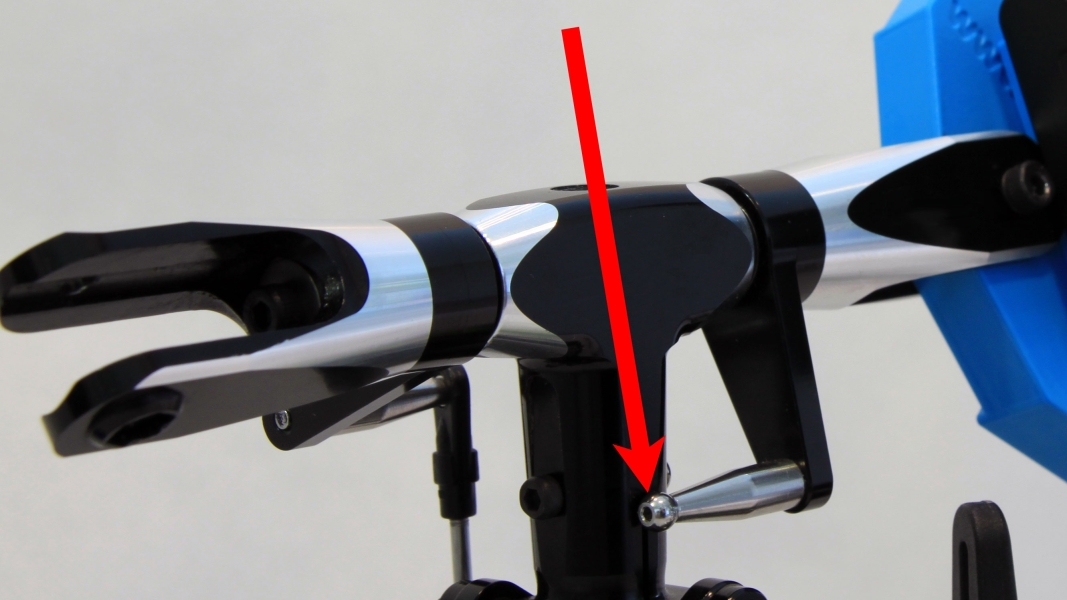
First position
The Soko Helical/Soko Kit is mounted as main blade. Now open the linkage of the blade grip and turn the blade grip until it rests on the side of the rotor head. On a DFC head style just open the linkage of the swash plate, flip it up and rest the upper part of the linkage on the side of the rotor head.
The only important thing is, that the blade grip itself is stable during
a full turn of the rotor head. In other words: The blade grip should
not rotate during a full turn of the rotor head.
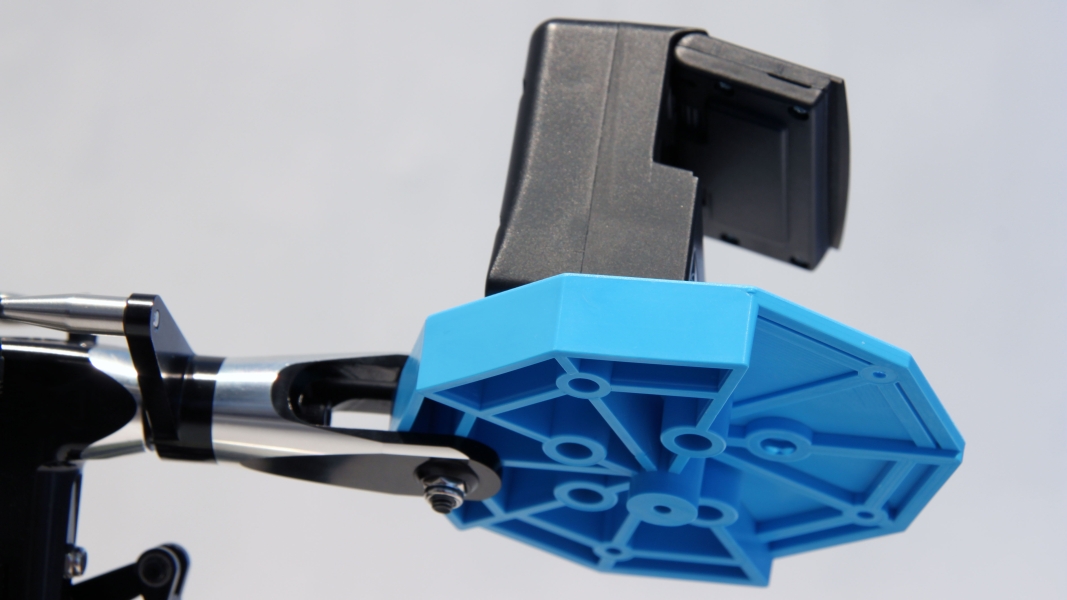
Second position (as main blade)
The Soko Helical is designed to imitate all five main blade root sizes which are:
3mm root thickness and M2 screw (= 250 main blade size)
4.5mm root thickness and M3 screw (= 360/450 size)
10mm root thickness and M3 screw (= 500 size)
12mm root thickness and M4 screw (= 550/600/630 size)
14mm root thickness and M5 screw (= 700/770/800 size)
If your helicopter's blade grip openings don't support those root thicknesses use shims to make it fit. Your heli kit probably came with the shims as the manufacturer knows you might want to use standard blades some day.
See our Soko Heli Toolbox app, How it works and PDF instructions for more details and to show you how it works for your helicopter - even the most unusual ones.